

This article will guide you to customize the look and feel of your Gist Messenger so your website visitors and customers feel like it's part of your product or site..
To start customizing your Gist Messenger, navigate to Settings > Tools > Messenger > Appearance. The right-hand side of the page will provide a real-time preview so you can see how it looks like as you make changes.
Here are the 5 easy and simple steps we highly recommend you setup:
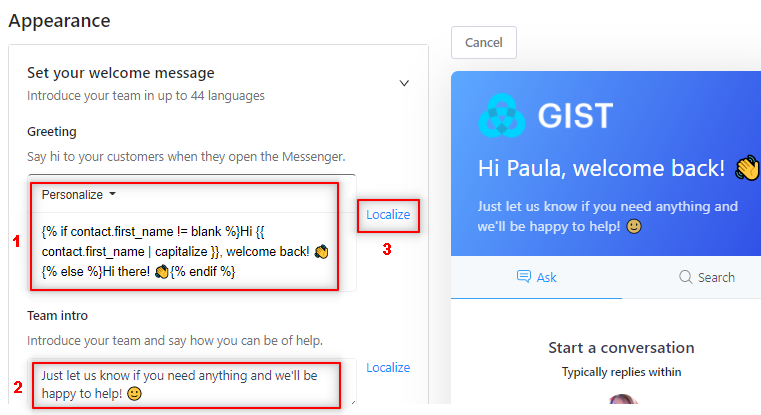
1. Set your welcome message
- Create a warm and friendly greeting. Use the greeting message to welcome your visitors in a personal, friendly way. is It fully supports liquid tags, and you can personalize your message using any contact property to serve your first-time visitors or returning customers' experience better. We at Gist use IF conditions to check if the contact has a first name stored in Gist, and use that to welcome them with this message, "Hi (first name), welcome back!👋". Contacts without a first name set would just see, "Hi there!👋".
- Write your team intro. Let your website visitors and customers know who your team is and how you can help them. You can also insert emojis to make it more lively and engaging.
- Localize the language of your welcome message. If more than one language has been added to your Messenger, you will be able to localize your greeting and team into in each of those additional languages. Learn more about how localization works here.
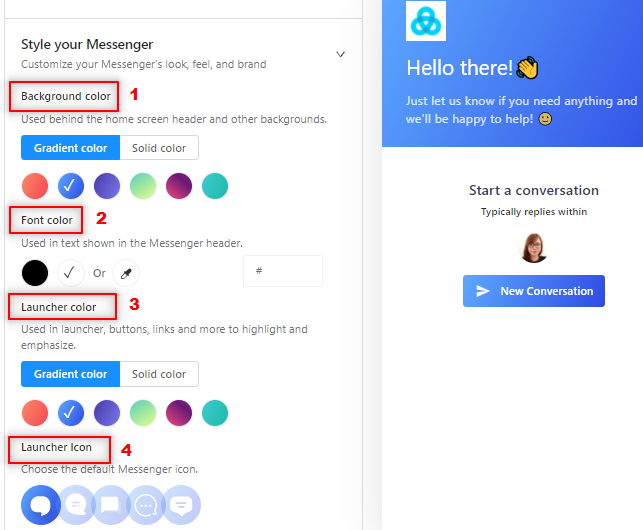
2. Style your Messenger
You can easily customize the Messenger's style to match your brand. You can add your own logo, choose a background color, launcher color and change your launcher icon as well.
- Background color is used behind your home screen header and other backgrounds. It's important to choose one that contrasts against the background of your site.
- Font color that contrasts well with the background color. If your background color is darker, we recommend using white or light colors for font.
- Launcher color allows your Messenger to be easily and clearly seen. You can choose from a huge variety of solid and gradient colors to make your Messenger stand out and attract visitors.
- Launcher icon is used to open and close the Messenger. Choose from five different icons that match your style.
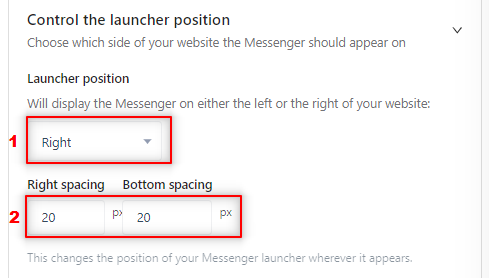
3. Control the launcher position
By default, the Messenger appears on the bottom-right corner of your website but if you prefer to move to the bottom-left or even reposition it using spacing, you can do it here.
- Move your Messenger either to the left or right side of your website.
- Adjust the bottom and right/left spacing of the Messenger. Note that changes in spacing will only show on desktops and NOT on mobile devices.
Note: To reposition the Messenger on Mobile devices, you can make sure of CSS styles. Here's a code sample to help you get started.
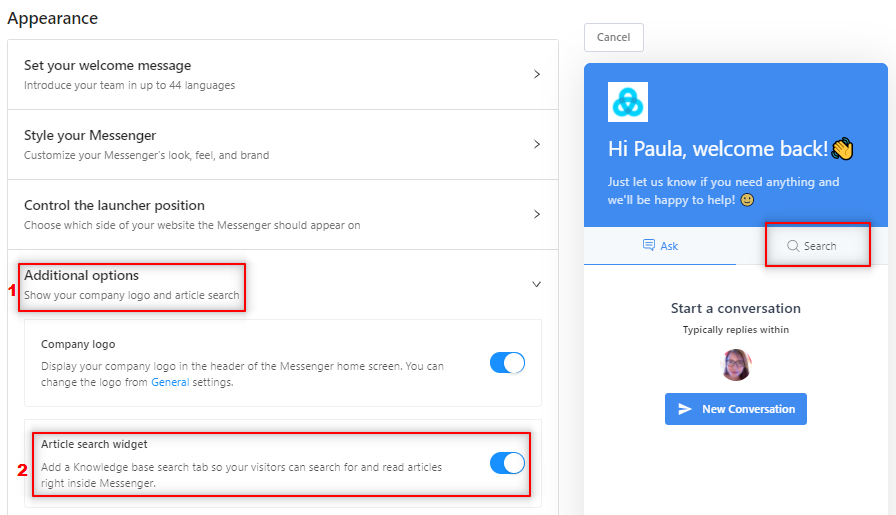
4. Show your company logo
- Choose to show your company logo inside the header of your Messenger. Learn more on how to add your logo and customize your branding here.
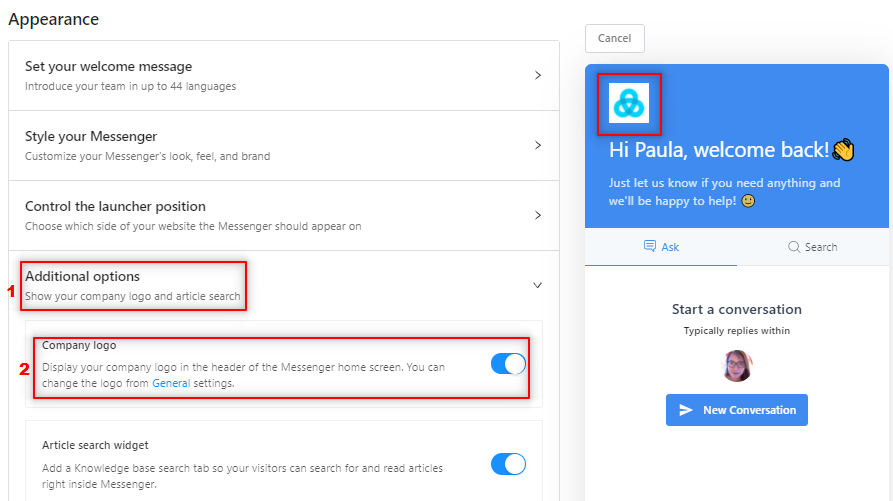
5. Integrate Knowledge Base
- Turn on the Article search widget to integrate your Knowledge Base right inside the Messenger. Note that this feature is available if you have the Support or All-in-One plan.
Note: You must have the Gist tracking code installed to see the Gist Messenger on your website. Check out our installation guide if you haven't done it yet.
What's Next?- Let your visitors know when you’re out of the office.
- Control who can see the Messenger on your website.
- Show or hide Messenger on specific pages.
Need Help?
If you have any further questions, please start a Live Chat. Just "Click " on the Chat Icon in the lower right corner to talk with our support team.